Green Village Medical

Hair Transplant Aftercare: The First 10 Days – What to Do and Avoid

Hair Transplant Aftercare: The First 10 Days – What to Do and Avoid

A hair transplant is a transformative journey that restores not only your hair but also your confidence. However, the success of the procedure relies heavily on how carefully you follow the post-operative care instructions. The first 10 days after surgery are the most crucial for ensuring that the transplanted follicles (grafts) settle securely and begin their growth cycle naturally.

At Green Village Medical, we guide every patient step-by-step, providing clear and comprehensive aftercare instructions to ensure the best possible results. In this guide, you’ll discover exactly what to do — and what to avoid — during this sensitive period.


Why the First 10 Days Are So Important

In the first 10 days, the newly implanted grafts are extremely delicate. Any trauma, friction, or infection can damage them, potentially compromising the final results. Proper care helps the follicles establish a strong foundation, leading to natural, long-lasting growth.

Your Main Goals During This Period:

  • Protect the transplanted area from any trauma or friction.
  • Keep the scalp clean and prevent infections.
  • Reduce swelling and discomfort.
  • Support healing with adequate sleep, nutrition, and hydration.

Day-by-Day Recovery Timeline

Day 1 – Surgery Day

Right after the procedure, you will leave the clinic with a protective dressing. It’s normal to experience some redness, swelling, or slight discomfort.

  • Rest completely and avoid sudden head movements.
  • Sleep with your head elevated at a 30–45° angle.
  • Do not touch or scratch the transplanted area.

Days 2–3 – Early Healing

Swelling might slightly increase during these days, especially on the forehead or around the eyes. This is a natural healing response.

  • Continue to sleep with your head elevated.
  • Take all prescribed medications on schedule.
  • Avoid direct sunlight and dirty environments.

Days 4–5 – First Gentle Wash

At this stage, you’ll have your first gentle wash, which is essential for removing dried blood and debris without harming the grafts.

  • Use only the shampoo recommended by Green Village Medical.
  • Gently pour lukewarm water over the scalp — never rub.
  • Pat dry with a soft towel.

Days 6–7 – Scab Formation

Small scabs will form around the grafts — this is completely normal. Do not pick or scratch them, as this can dislodge the grafts.

  • Continue gentle washing to help soften scabs.
  • Avoid wearing tight hats or helmets.
  • Do not engage in strenuous activities or exercise.

Days 8–10 – Stabilization Phase

By the end of the first 10 days, the grafts will begin to stabilize, and most scabs will naturally fall off.

  • Return to light daily activities but avoid any risk of scalp injury.
  • Continue avoiding sports, pools, and saunas.
  • Schedule a follow-up visit with your surgeon.

What You Should Do

  • Follow all aftercare instructions from your clinic.
  • Maintain proper scalp hygiene to prevent infections.
  • Drink plenty of water and eat a balanced, vitamin-rich diet.
  • Sleep on your back with your head elevated for at least 5 days.
  • Use only clinic-approved hair care products.

What You Should Avoid

  • Do not touch, rub, or scratch the transplanted area.
  • Avoid alcohol and smoking — they slow down the healing process.
  • Do not go to pools, saunas, or steam rooms.
  • Avoid heavy exercise or sports activities.
  • Stay away from direct sunlight exposure.

Understanding the Shedding Phase

Around weeks 2–4, you may notice that some of the transplanted hairs begin to shed. This is completely normal and part of the natural growth cycle. The follicles remain intact beneath the skin and will soon produce new, healthy hair.

  • Do not panic — shedding is temporary.
  • Continue gentle washing and scalp care.
  • Avoid styling products unless approved by your doctor.

Book Your Free Consultation Today

Ready to start your hair restoration journey? Contact Green Village Medical today for a personalized treatment plan and expert care.

Book Your Consultation

Follow us on Instagram: @greenvillagemedical

Common Aesthetic Mistakes and How to Avoid Them

Common Mistakes in Cosmetic Procedures & How to Avoid Them

Cosmetic treatments are more popular than ever, thanks to modern technology, skilled surgeons, and the desire for enhanced self-confidence. However, achieving the best results requires more than just booking a procedure—it also involves preparation, education, and careful decision-making.

Here are some of the most common mistakes people make when undergoing aesthetic procedures and how to avoid them:

1. Setting Unrealistic Expectations

One of the biggest mistakes is expecting immediate perfection or complete transformation. Cosmetic procedures are designed to enhance your natural beauty, not create an entirely new face or body. Patients who go into surgery thinking they will look like a celebrity often end up disappointed.

💡 Tip: Always ask your doctor to show you realistic before & after photos of previous patients. Have an open discussion about what can and cannot be achieved with your specific anatomy.

2. Choosing the Wrong Provider Based on Price

Choosing a clinic solely based on low prices is risky. Unlicensed clinics or inexperienced practitioners may offer attractive deals but compromise on hygiene, safety, and technique.

💡 Tip: Make sure your clinic is licensed, the surgeon is board-certified, and the facility meets international health standards. When it comes to your body, safety should always come before savings.

3. Following Trends Instead of Personal Needs

Social media trends like “fox eyes,” “Russian lips,” or ultra-high BBLs may not suit everyone. What looks good on someone else might not be right for your face or body proportions.

💡 Tip: Focus on what works best for your unique features. A personalized approach always delivers more natural and satisfying results than following temporary trends.

4. Neglecting Pre- and Post-Procedure Instructions

Many patients skip vital steps like quitting smoking before surgery or taking prescribed antibiotics after it. Others return to work too early or ignore rest periods, affecting their recovery and results.

💡 Tip: Strictly follow all instructions given by your surgeon. Ask questions if anything is unclear. Remember: Recovery is just as important as the procedure itself.

5. Overdoing or Repeating Procedures Too Soon

Repeating fillers or Botox too frequently, or combining too many treatments at once, can lead to unnatural results. Patience is key—your body needs time to heal and adapt.

💡 Tip: Schedule touch-ups only when truly necessary and based on professional advice. Give your body time to show results before seeking more interventions.

6. Relying Solely on Online Images or Influencers

Heavily edited photos and influencer promotions can be misleading. What looks perfect online might not reflect real, long-term outcomes.

💡 Tip: Use online content for inspiration—not as your only research source. Look for verified reviews, clinic accreditations, and direct consultations before making any decision.

7. Ignoring Overall Health and Lifestyle

Aesthetic results are influenced by your lifestyle. Poor diet, smoking, lack of sleep, and dehydration can slow recovery and worsen results.

💡 Tip: Maintain a healthy lifestyle before and after your procedure. Good skin care, proper nutrition, and regular hydration significantly improve healing and outcomes.

Conclusion: Be Informed, Be Realistic, Be Safe

Undergoing an aesthetic procedure is a personal journey. Whether you’re planning a rhinoplasty, hair transplant, or smile makeover, your choices matter. By avoiding these common mistakes, you set yourself up for a smoother recovery, more natural results, and long-term satisfaction.

🌍 Thinking of having your procedure abroad? Always choose internationally accredited clinics with multilingual support and transparent communication—because trust and expertise matter most.

Stem Cell Treatment

Understanding Stem Cells

What are Stem Cells?
Stem cells are undifferentiated cells with the remarkable ability to develop into various cell types within the body.
They serve as the body’s raw materials, capable of replenishing other cells indefinitely through cell division.
Stem cells can be classified into embryonic stem cells, adult stem cells, and induced pluripotent stem cells, each with distinct characteristics and sources.
The Science Behind Stem Cell Treatment
Stem cell treatment harnesses the regenerative potential of these versatile cells to repair, replace, or regenerate damaged tissues and organs.
Through precise manipulation in laboratory settings, stem cells can be directed to differentiate into specific cell types required for therapeutic purposes.
This approach holds immense promise for treating a wide array of medical conditions, ranging from neurological disorders to degenerative diseases.

Applications of Stem Cell Treatment

Medical Marvels: Green Village Medical at the Forefront At Green Village Medical, we pioneer innovative applications of stem cell treatment, offering cutting-edge solutions tailored to individual patient needs.
Our multidisciplinary team of experts employs state-of-the-art techniques to harness the therapeutic potential of stem cells effectively.
From orthopedic injuries to autoimmune disorders, we explore the vast spectrum of conditions amenable to stem cell therapy, striving to redefine the boundaries of modern medicine.
Orthopedic Regeneration: Healing from Within Green Village Medical specializes in orthopedic stem cell treatment, facilitating the regeneration of damaged cartilage, tendons, and ligaments.
By injecting stem cells directly into injured joints, we stimulate tissue repair mechanisms, promoting accelerated healing and improved function.
This minimally invasive approach offers an alternative to traditional surgical interventions, minimizing recovery times and optimizing outcomes.

  • Regular Dental Check-Ups:
    • Frequency: Visit your dentist every six months for a check-up and cleaning.
    • Benefits: Regular visits allow for early detection and treatment of dental issues, professional cleaning to remove tartar, and personalized advice on maintaining oral health.
  • Dental Cleanings:
    • Procedure: Professional cleanings remove plaque and tartar that regular brushing and flossing can’t reach. Your dentist or dental hygienist will use special tools to clean your teeth above and below the gumline.
  •  
  • Sealants:
    • Application: Dental sealants are thin, protective coatings applied to the chewing surfaces of back teeth (molars) to prevent cavities.
    • Benefits: Sealants protect against decay by sealing out food particles and bacteria.
  • Fluoride Treatments:
    • Application: Professional fluoride treatments involve applying a high concentration of fluoride to the teeth, typically in the form of a gel, foam, or varnish.
    • Benefits: Fluoride strengthens tooth enamel and helps prevent cavities.
  • Healthy Diet:
    • Recommendations: Consume a balanced diet rich in fruits, vegetables, lean proteins, and whole grains. Limit sugary snacks and drinks, as sugar feeds harmful bacteria that cause cavities.
    • Hydration: Drink plenty of water, especially after meals, to help wash away food particles and neutralize acids produced by bacteria in the mouth.
  • Avoid Tobacco Products:
    • Impact: Smoking and using other tobacco products can lead to gum disease, tooth loss, and oral cancer.
    • Recommendation: Seek support to quit tobacco use to improve oral and overall health.
  • Limit Alcohol Consumption:
    • Impact: Excessive alcohol consumption can increase the risk of oral cancer and negatively affect oral hygiene.
    • Recommendation: Drink alcohol in moderation and maintain good oral hygiene.
  •  
  • Children’s Oral Care:
    • Start Early: Begin cleaning your child’s mouth even before teeth appear by wiping the gums with a soft, damp cloth. Once teeth emerge, use a small, soft-bristle toothbrush and a rice-sized amount of fluoride toothpaste.
    • Supervision: Supervise children’s brushing until they are around 7-8 years old to ensure they use the right amount of toothpaste and brush effectively.
  • Senior Oral Care:
    • Challenges: Seniors may face unique oral health challenges such as dry mouth, root decay, and tooth loss.
    • Solutions: Maintain regular dental visits, use fluoride toothpaste and mouthwash, stay hydrated, and consider using an electric toothbrush for easier cleaning.
  •  
  • Tooth Decay (Cavities):
    • Prevention: Maintain good oral hygiene, limit sugary foods and drinks, use fluoride products, and get regular dental check-ups.
  • Gum Disease (Periodontal Disease):
    • Prevention: Brush and floss daily, use antimicrobial mouthwash, avoid tobacco, and visit your dentist regularly for cleanings.
  • Tooth Sensitivity:
    • Prevention: Use toothpaste designed for sensitive teeth, avoid acidic foods and drinks, and maintain good oral hygiene.
  • Bad Breath (Halitosis):
    • Prevention: Brush and floss daily, clean your tongue, stay hydrated, avoid foods that cause bad breath, and visit your dentist regularly.
  •  

Oral and Dental Care

Oral and Dental Care: A Comprehensive Guide by Green Village Medical

Importance of Oral and Dental Care

Maintaining good oral and dental care is crucial for overall health and well-being. Healthy teeth and gums not only contribute to a beautiful smile but also prevent various dental problems such as tooth decay, gum disease, and bad breath. Additionally, poor oral health can be linked to serious health issues such as heart disease, diabetes, and respiratory infections.

Daily Oral Hygiene Routine

  1. Brushing:
    • Frequency: Brush at least twice a day, preferably in the morning and before bedtime.
    • Technique: Use a soft-bristle toothbrush and fluoride toothpaste. Brush for at least two minutes, ensuring you cover all surfaces of your teeth – the front, back, and chewing surfaces. Hold the toothbrush at a 45-degree angle to your gums and use gentle, circular motions.
  2. Flossing:
    • Frequency: Floss at least once a day to remove plaque and food particles between teeth and under the gumline.
    • Technique: Use about 18 inches of floss, winding most of it around each middle finger, leaving about 1-2 inches to work with. Gently slide the floss between your teeth, curve it into a C shape against the side of each tooth, and move it up and down.
  3. Mouthwash:
    • Frequency: Use an antimicrobial or fluoride mouthwash once or twice a day.
    • Benefits: Mouthwash can help reduce plaque, fight gum disease, and freshen breath. It also provides an additional layer of protection against cavities.
  • Regular Dental Check-Ups:
    • Frequency: Visit your dentist every six months for a check-up and cleaning.
    • Benefits: Regular visits allow for early detection and treatment of dental issues, professional cleaning to remove tartar, and personalized advice on maintaining oral health.
  • Dental Cleanings:
    • Procedure: Professional cleanings remove plaque and tartar that regular brushing and flossing can’t reach. Your dentist or dental hygienist will use special tools to clean your teeth above and below the gumline.
  •  
  • Sealants:
    • Application: Dental sealants are thin, protective coatings applied to the chewing surfaces of back teeth (molars) to prevent cavities.
    • Benefits: Sealants protect against decay by sealing out food particles and bacteria.
  • Fluoride Treatments:
    • Application: Professional fluoride treatments involve applying a high concentration of fluoride to the teeth, typically in the form of a gel, foam, or varnish.
    • Benefits: Fluoride strengthens tooth enamel and helps prevent cavities.
  • Healthy Diet:
    • Recommendations: Consume a balanced diet rich in fruits, vegetables, lean proteins, and whole grains. Limit sugary snacks and drinks, as sugar feeds harmful bacteria that cause cavities.
    • Hydration: Drink plenty of water, especially after meals, to help wash away food particles and neutralize acids produced by bacteria in the mouth.
  • Avoid Tobacco Products:
    • Impact: Smoking and using other tobacco products can lead to gum disease, tooth loss, and oral cancer.
    • Recommendation: Seek support to quit tobacco use to improve oral and overall health.
  • Limit Alcohol Consumption:
    • Impact: Excessive alcohol consumption can increase the risk of oral cancer and negatively affect oral hygiene.
    • Recommendation: Drink alcohol in moderation and maintain good oral hygiene.
  •  
  • Children’s Oral Care:
    • Start Early: Begin cleaning your child’s mouth even before teeth appear by wiping the gums with a soft, damp cloth. Once teeth emerge, use a small, soft-bristle toothbrush and a rice-sized amount of fluoride toothpaste.
    • Supervision: Supervise children’s brushing until they are around 7-8 years old to ensure they use the right amount of toothpaste and brush effectively.
  • Senior Oral Care:
    • Challenges: Seniors may face unique oral health challenges such as dry mouth, root decay, and tooth loss.
    • Solutions: Maintain regular dental visits, use fluoride toothpaste and mouthwash, stay hydrated, and consider using an electric toothbrush for easier cleaning.
  •  
  • Tooth Decay (Cavities):
    • Prevention: Maintain good oral hygiene, limit sugary foods and drinks, use fluoride products, and get regular dental check-ups.
  • Gum Disease (Periodontal Disease):
    • Prevention: Brush and floss daily, use antimicrobial mouthwash, avoid tobacco, and visit your dentist regularly for cleanings.
  • Tooth Sensitivity:
    • Prevention: Use toothpaste designed for sensitive teeth, avoid acidic foods and drinks, and maintain good oral hygiene.
  • Bad Breath (Halitosis):
    • Prevention: Brush and floss daily, clean your tongue, stay hydrated, avoid foods that cause bad breath, and visit your dentist regularly.
  •  

Total Teeth Prosthesis

Total Teeth Prosthesis: A Comprehensive Guide

Total teeth prosthesis, commonly known as full dentures, are removable dental appliances used to replace an entire arch of missing teeth. These prostheses are designed to restore the function and appearance of natural teeth, allowing patients to chew, speak, and smile confidently.

Types of temporary Total Teeth Prosthesis

Conventional Full Dentures:
Made after the remaining teeth have been removed and the gum tissue has healed, usually taking several months.
Fully removable and custom-fitted to the patient’s mouth.
Immediate Full Dentures:
Inserted immediately after the removal of the remaining teeth.
Allow patients to have teeth during the healing process but may require adjustments as the gums and bone heal.
Implant-Supported Full Dentures:
Attached to dental implants surgically placed in the jawbone.
Offer greater stability and comfort compared to conventional dentures.

Benefits of Total Teeth Prosthesis

Restored Functionality: Enables normal chewing and speaking abilities.
Improved Appearance: Supports facial muscles, giving a natural look and preventing the sunken appearance caused by missing teeth.
Enhanced Confidence: Helps improve self-esteem by restoring a complete and attractive smile.
Removability: Easy to clean and maintain due to their removable nature.

  1. Initial Consultation:
    • A thorough examination of the mouth, including X-rays and impressions, to assess the condition of the jawbone and gum tissue.
    • Discussion of patient’s needs and preferences.
  2. Teeth Extraction (if necessary):
    • Removal of any remaining teeth to prepare the mouth for the prosthesis.
    • Healing time may vary, and temporary dentures may be provided.
  3. Impressions and Measurements:
    • Taking detailed impressions of the mouth to create custom-fitted dentures.
    • Measuring the bite and alignment to ensure proper fit and comfort.
  4. Fabrication:
    • Dentures are crafted in a dental laboratory based on the impressions and measurements.
    • Typically made from acrylic resin and other biocompatible materials.
  5. Fitting and Adjustments:
    • Initial fitting to check the comfort, fit, and appearance of the dentures.
    • Necessary adjustments are made to ensure proper alignment and comfort.
    • Instructions on care and maintenance are provided.
  • Cleaning:
    • Remove and rinse dentures after eating to remove food particles.
    • Brush dentures daily with a soft-bristle brush and denture cleanser.
    • Soak dentures overnight in a denture-cleaning solution to keep them moist and maintain their shape.
  • Oral Hygiene:
    • Brush your gums, tongue, and palate every morning before putting in the dentures to stimulate circulation and remove plaque.
  • Regular Check-Ups:
    • Visit your dentist regularly for check-ups and professional cleaning.
    • Periodic adjustments may be necessary to maintain the fit and comfort of the dentures.
  1. Sore Spots and Irritation:
    • May occur during the initial adjustment period.
    • Denture adhesives or adjustments by the dentist can alleviate discomfort.
  2. Difficulty Eating and Speaking:
    • Practice eating small bites of soft food and gradually introduce harder foods.
    • Practice speaking by reading aloud to get accustomed to the dentures.
  3. Slippage and Movement:
    • Use denture adhesives to improve stability.
    • If persistent, consult your dentist for possible adjustments or relining.

Tooth Extraction

What is Tooth Extraction

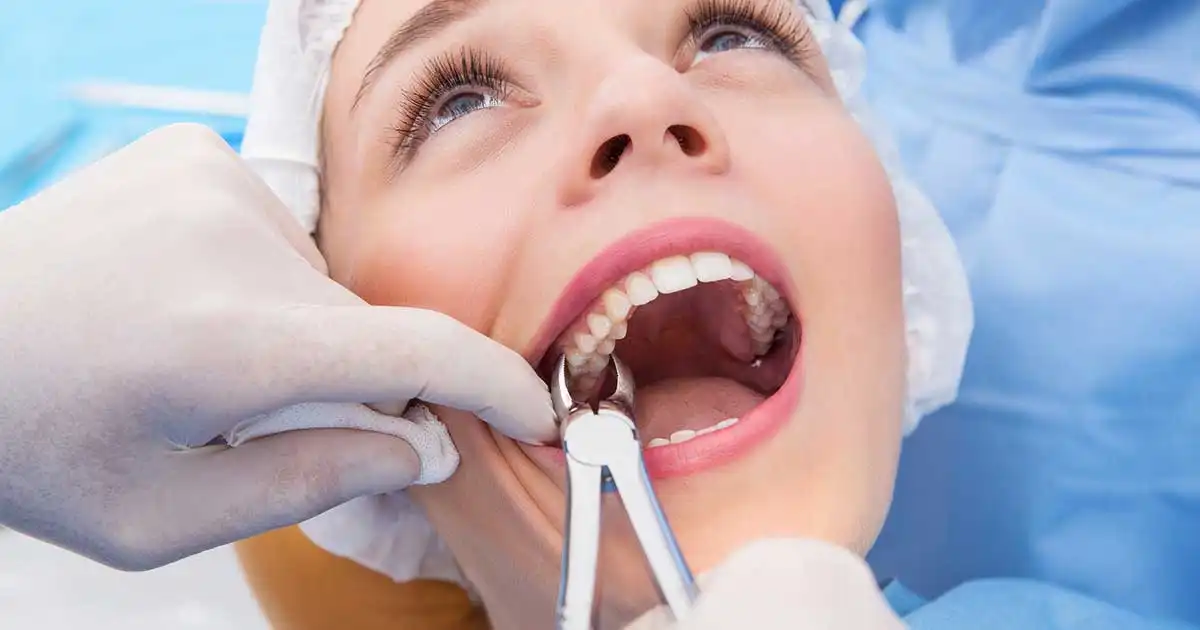
Tooth extraction is the process of removing a tooth from its socket in the jawbone. This procedure is commonly performed by dentists and oral surgeons for various reasons, including severe tooth decay, infection, crowding, and impacted teeth.

Reasons for Tooth Extractions

Severe Tooth Decay:
When tooth decay extends deep into the tooth and affects the pulp, extraction might be necessary if a root canal treatment is not feasible.
Gum Disease:
Advanced periodontal disease can cause teeth to become loose due to the destruction of the surrounding bone and gum tissue.
Impacted Teeth:
Wisdom teeth (third molars) often become impacted, meaning they do not fully emerge or grow at an angle, causing pain and potential infection.
Overcrowding:
In orthodontic treatments, teeth may be extracted to create space for proper alignment.
Infection:
An infection in the tooth that does not respond to antibiotics may require extraction to prevent it from spreading.
Trauma:
Teeth that are severely damaged due to trauma or injury may need to be removed.

Types of Tooth Extraction

Simple Extraction:

Performed on visible teeth under local anesthesia. The dentist loosens the tooth with an elevator and removes it with forceps.

Surgical Extraction:

Necessary for teeth that are not easily accessible, such as impacted wisdom teeth. This procedure may require local anesthesia and sedation. The dentist or oral surgeon makes an incision in the gum to access the tooth.

  1. Preparation:
    • A thorough examination, including X-rays, is conducted to assess the tooth’s position and condition.
    • The patient’s medical history is reviewed to ensure no underlying conditions affect the procedure.
  2. Anesthesia:
    • Local anesthesia is administered to numb the area around the tooth. For surgical extractions, sedation or general anesthesia may be used.
  3. Extraction:
    • In a simple extraction, the dentist uses an elevator to loosen the tooth and forceps to remove it.
    • In a surgical extraction, an incision is made in the gum, and the tooth may be broken into smaller pieces for easier removal.
  4. Post-Extraction Care:
    • Gauze is placed over the extraction site to control bleeding.
    • Instructions for home care, including pain management, oral hygiene, and dietary restrictions, are provided.
  • Bleeding:
    • Bite on gauze for 30-45 minutes to control bleeding. If bleeding persists, replace the gauze and continue to apply pressure.
  • Pain Management:
    • Over-the-counter pain relievers like ibuprofen or prescribed medications can help manage discomfort.
    • Apply ice packs to the outside of the cheek to reduce swelling.
  • Oral Hygiene:
    • Avoid rinsing, spitting, or using a straw for the first 24 hours to prevent dislodging the blood clot.
    • After 24 hours, rinse gently with warm salt water to keep the extraction site clean.
  • Diet:
    • Stick to soft foods such as yogurt, applesauce, and mashed potatoes for the first few days.
    • Avoid hot, spicy, or crunchy foods that could irritate the extraction site.
  • Activity:
    • Rest and avoid strenuous activities for the first 24 hours to minimize bleeding and swelling.
  • Dry Socket:
    • Occurs when the blood clot at the extraction site is dislodged, exposing the underlying bone and nerves. Symptoms include severe pain and an unpleasant odor. Contact your dentist if you suspect a dry socket.
  • Infection:
    • Signs include fever, increased pain, swelling, and pus discharge. If any of these symptoms occur, seek immediate medical attention.
  • Damage to Adjacent Teeth:
    • In rare cases, adjacent teeth, dental work, or the jawbone may be damaged during extraction.

Sapphire Hair Transplant

Sapphire Hair Transplant: A Comprehensive Guide by Green Village Medical

What is Sapphire Hair Transplant?

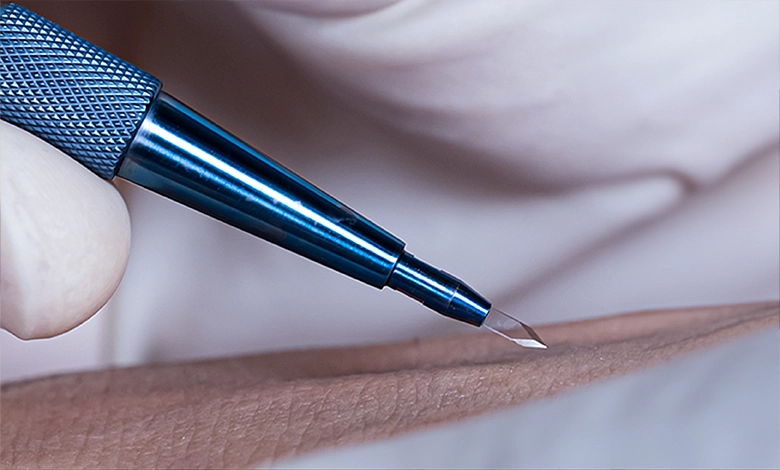
Sapphire hair transplant, also known as Sapphire FUE (Follicular Unit Extraction), is an advanced hair restoration technique that uses special blades made from sapphire gemstone to create recipient sites for hair transplantation. This method offers several advantages over traditional FUE techniques, including higher precision, minimal scarring, and faster healing.

Nasolabial Fillers

Nasolabial Fillers: Reviving Facial Youth

Welcome to Green Village Medical’s comprehensive guide to nasolabial fillers, a popular cosmetic procedure aimed at enhancing facial harmony and restoring youthful contours. Nasolabial fillers have gained prominence as a non-invasive solution for addressing smile lines and deepening folds around the mouth. In this informative overview, we delve into the intricate world of nasolabial fillers, exploring their applications, benefits, considerations, and the science behind their efficacy.

Understanding Nasolabial Fillers

  • Defining Nasolabial Fillers
    • Nasolabial fillers, also referred to as laugh line fillers or smile line fillers, are injectable dermal fillers meticulously crafted to soften and diminish the appearance of nasolabial folds.
    • Nasolabial folds are the lines extending from the sides of the nose to the corners of the mouth, becoming more pronounced over time due to the natural aging process and loss of facial volume.
    • By strategically injecting hyaluronic acid-based fillers into these creases, nasolabial fillers replenish volume, smooth wrinkles, and rejuvenate facial aesthetics.
  • The Science Behind Nasolabial Fillers
    • Hyaluronic acid, a naturally occurring substance in the skin, serves as the primary constituent of nasolabial fillers.
    • When introduced into the nasolabial folds, hyaluronic acid attracts and retains moisture, plumping the skin and diminishing the depth of wrinkles.
    • The gel-like consistency of hyaluronic acid fillers ensures immediate volumizing effects, with results typically lasting several months to a year, depending on the specific formulation and individual metabolic factors.

Applications of Nasolabial Fillers

  • Restoring Youthful Expression: Softening Smile Lines
    • Nasolabial fillers offer a targeted approach to softening and smoothing smile lines, thereby rejuvenating the midface.
    • By replenishing lost volume and filling in deep creases, nasolabial fillers create a more youthful and refreshed contour along the nasolabial area.
    • Green Village Medical specializes in tailoring nasolabial filler treatments to each patient’s unique facial anatomy and aesthetic goals, ensuring harmonious and natural-looking results with minimal downtime.
  • Volume Enhancement: Combatting Age-Related Changes
    • With age, the loss of facial volume and elasticity contributes to the formation of deep wrinkles and hollow areas, particularly around the nasolabial folds.
    • Nasolabial fillers provide an effective solution for restoring lost volume and enhancing facial contours, resulting in a revitalized and more youthful appearance.
    • Through precise injections targeted at key areas of volume depletion, such as the cheeks, temples, and jawline, Green Village Medical achieves results that defy the effects of aging and restore facial balance.

Mustache Transplant

Mustache Transplant: A Comprehensive Guide by Green Village Medical

What is a Mustache Transplant?

A mustache transplant is a surgical procedure designed to enhance or restore the appearance of the mustache by transplanting hair follicles from a donor area, typically the back of the scalp, to the upper lip. This procedure is suitable for individuals with thin, patchy, or absent mustaches who desire a fuller, more defined look.

Mid-Face Fillers

Mid-Face Fillers: A Complete Guide to Facial Rejuvenation

Welcome to Green Village Medical’s comprehensive guide to mid-face fillers, a transformative cosmetic procedure designed to restore volume, enhance contours, and rejuvenate the overall appearance of the face. Mid-face fillers have emerged as a popular solution for addressing age-related volume loss, hollowing, and sagging in the mid-facial region. In this detailed overview, we explore the intricacies of mid-face fillers, including their applications, benefits, considerations, and the science behind their effectiveness.

Understanding Mid-Face Fillers

  • Defining Mid-Face Fillers
    • Mid-face fillers, also known as cheek fillers or cheek augmentation, involve the strategic injection of dermal fillers to enhance volume and lift in the mid-facial area.
    • This technique targets the cheeks, under-eye area, and temples, addressing hollowing, sagging, and loss of definition that occurs with age.
    • Mid-face fillers can restore youthful contours, improve facial symmetry, and create a more balanced and harmonious appearance.
  • The Science Behind Mid-Face Fillers
    • Mid-face fillers typically utilize hyaluronic acid-based dermal fillers, which mimic the body’s natural hyaluronic acid to restore volume and hydration to the skin.
    • Hyaluronic acid attracts and retains moisture, plumping the skin and providing structural support to the underlying tissues.
    • The gel-like consistency of hyaluronic acid fillers allows for precise placement and sculpting, ensuring natural-looking results that seamlessly integrate with the surrounding tissues.

Conclusion

In conclusion, mid-face fillers offer a safe and effective solution for restoring volume, enhancing contours, and rejuvenating the overall appearance of the face. At Green Village Medical, we are dedicated to helping you achieve your aesthetic goals with precision and care. If you are considering mid-face filler treatment to revitalize your appearance and regain confidence, we invite you to schedule a consultation with us. Let us embark on a journey toward renewed facial youth and radiance with mid-face fillers at Green Village Medical.